
Dokumentation als Code mit Ansible und Asciidoctor
 @stoeps@infosec.exchange
#CLT2024
#doc-as-code
@stoeps@infosec.exchange
#CLT2024
#doc-as-code
Christoph Stoettner (stoeps)

Mein (langer) Weg zur Dokumentation

Notwendige Eigenschaften meiner Dokumentationslösung
Warum kein Wiki?
Markdown und reStructuredText
Wann brauche ich eine Dokumentation
Asciidoc / Asciidoctor
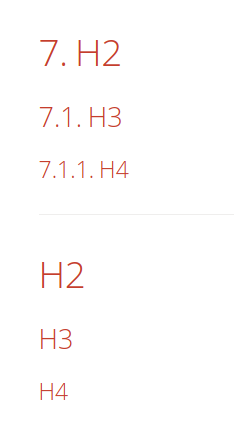
Syntax - Überschriften
:numbered: (1)

== H2
=== H3
==== H4

:!numbered: (2)

== H2
=== H3
==== H4| 1 | nummerierte Überschriften |
| 2 | Überschriften ohne Nummerierung |
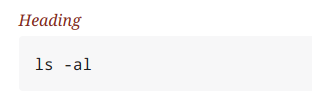
Heading above blocks and images
.Heading (1)
[source, bash]
----
ls -al
----

.Image (2)
image::test.png[role=fill]| 1 | Heading above Code block |
| 2 | Image heading |

Syntax - Lists
// some comment
def text():
    var = xyz
    x = x +1
==== Bullet Points
* Bullet Points
** Sub Bullet Point
==== Numbered Lists
. Numbered List
.. Sub 1
.. Sub 2
. Numbered 2
==== Definition Lists
CPU:: The brain of the computer.
Hard drive:: Permanent storage for operating system...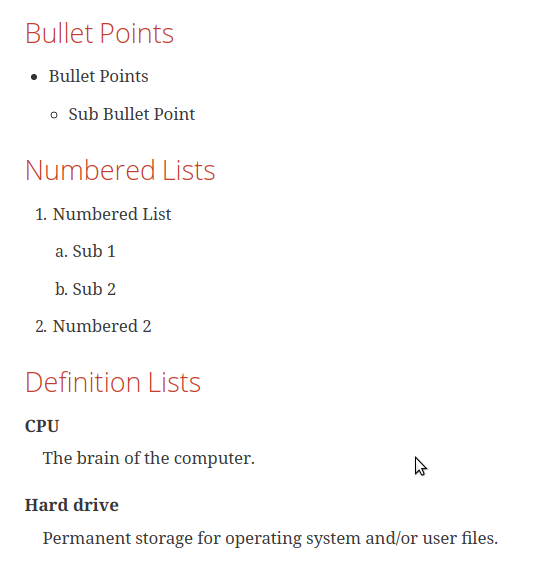
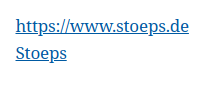
Links
https://www.stoeps.de[]        (1)
https://www.stoeps.de[Stoeps] (2)| 1 | Anzeige des Links |
| 2 | Linktext wird angezeigt |
Images
Tabellen
Use Inline Icons
Jedes Font Awesome Icon kann gesetzt werden
Muss im Dokument-Kopf aktiviert werden
:icons: fontSome Examples
icon:twitter[] Twitter https://twitter.com[@stoeps]
icon:linux[] Linux Icon
icon:windows[] Windows Icon
Admonition Blocks
Admonition Blocks in Html and PDF
NOTE: A note

TIP: Here is a tip

IMPORTANT: That's important

WARNING: Warning message

CAUTION: Caution, be careful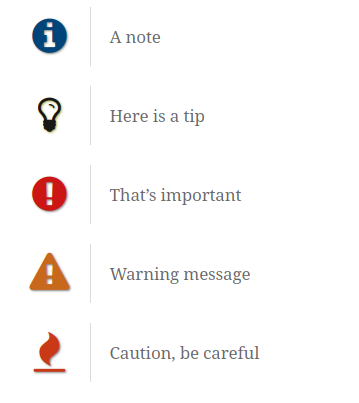
HTML
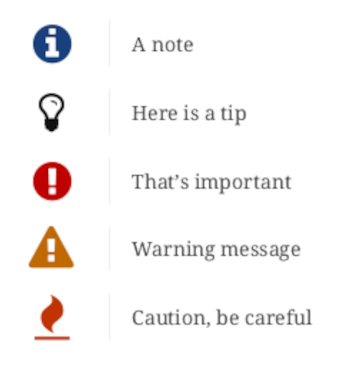
PDF
Menus, Keys and Buttons
:experimental: (1)| 1 | Die folgenden Beispiele sind noch als Experimental markiert |
.Copy Text
menu:Edit[Copy Special > Text]

.Button
Press kbd:[OK]

.Keyboard
kbd:[Ctrl+C] to stop this.
HTML
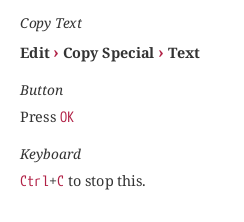
PDF
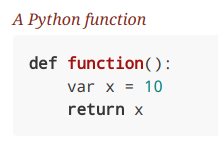
Sourcecode
Adding [source]
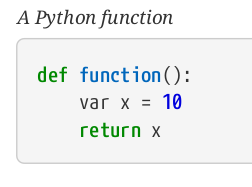
 .A Python function
 [source, python]
 ----
 def function():
    var x = 10
    return x
 ----
HTML
PDF
Including Files
Example Include
Callouts in Sources
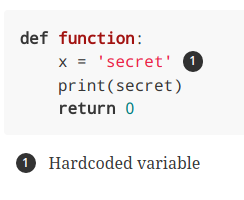
[source]
----
def function:
x = 'secret' # <1>
print(secret)
return 0
----
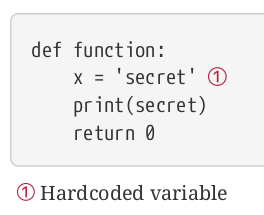
<1> Hardcoded variabledef function:
x = 'secret' (1)
print(secret)
return 0| 1 | Hardcoded variable |
HTML
PDF
Dokument Header

Plantuml - https://plantuml.com/
@startuml

skinparam rectangle {
	BackgroundColor DarkSeaGreen
	FontStyle Bold
	FontColor DarkGreen
}
skinparam usecase {
 	BackgroundColor Pink
 	FontColor DarkRed
 	FontStyle Bold
}
skinparam note {
	BackgroundColor LightYellow
	FontColor Black
}

:user: as u
(Robot Framework) as rf
(PSTT) as pstt
(Check Library) as chk

rectangle network as n1{
}

rectangle network as n2{
}

note as tc
	Test Case
	==
	Send...
	OnRecv...
	Get Data
	Check
end note

note as script1
	Script
	==
	Send...
	Recv...
	Get Data
end note

note as script2
	Script
	==
	Send...
	Recv...
	Get Data
end note

note as report1
  Report
  ==
  Data1
  Data2
  Data...
end note

note as report2
  Report
  ==
  Data1
  Data2
  Data...
end note

note as checklist
  Check List
  ==
  Check1
  Check2
end note

note as result
  Result
  ==
  Pass
  Fail
  Error
end note

u - tc
tc -> rf
rf . script1
script1 .> n1
n1 . script2
script2 .> pstt
pstt .. report1
n2 <. report1
report2 . n2
chk <. report2
rf -- checklist
checklist --> chk
result - chk
result --> u

@enduml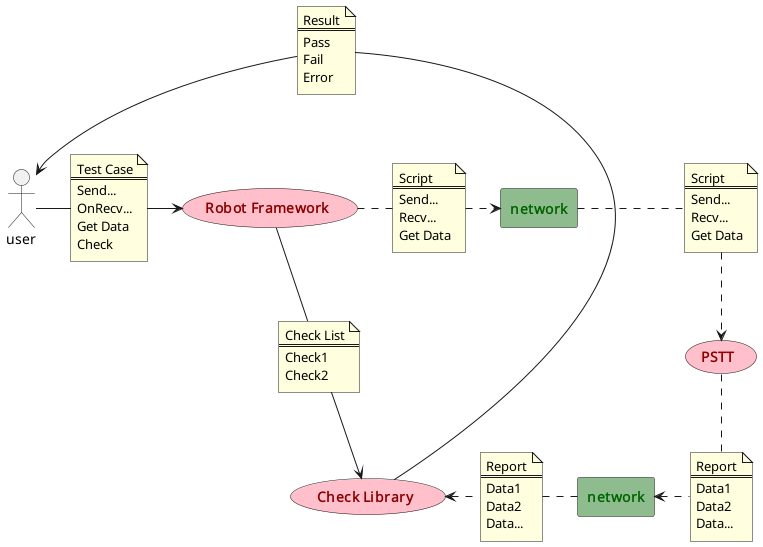
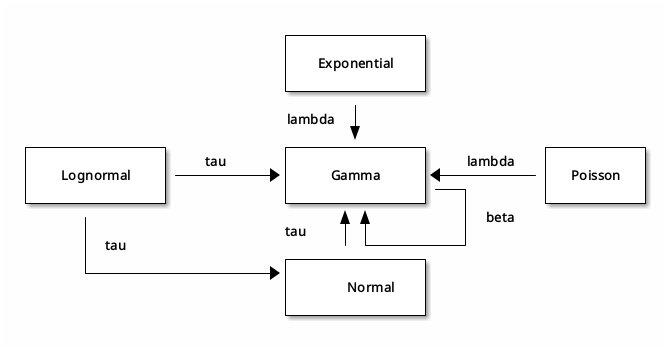
Ditaa - https://ditaa.sourceforge.net/
                       +-------------+
                       |             |
                       | Exponential |
                       |             |
                       +-------------+
                              |
                       lambda |
                              v
+-------------+        +-------------+           +---------+
|             |   tau  |             |   lambda  |         |
|  Lognormal  |------->|    Gamma    |<----------| Poisson |
|             |        |             |---+       |         |
+-------------+        +-------------+   |       +---------+
      |                      ^ ^         | beta
      |                tau   | |         |
      | tau                  | +---------+
      |                +-------------+
      +--------------->|             |
                       |     Normal  |
                       |             |
                       +-------------+
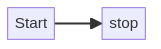
Mermaid - https://mermaid.js.org
gantt
    title A Gantt Diagram
    dateFormat YYYY-MM-DD
    section Section
        A task          :a1, 2024-03-17, 30d
        Another task    :after a1, 20d
    section Another
        Task in Another :2024-03-20, 12d
        another task    :24d
flowchart LR
Start --> stop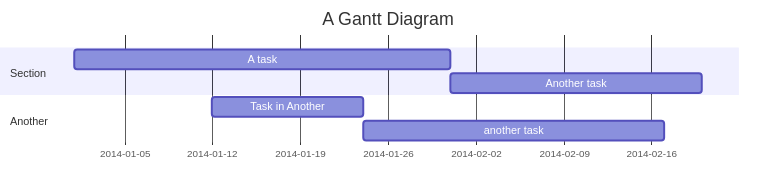
D2 - https://d2lang.com/
costumes: {
  shape: sql_table
  id: int {constraint: primary_key}
  silliness: int
  monster: int
  last_updated: timestamp
}

monsters: {
  shape: sql_table
  id: int {constraint: primary_key}
  movie: string
  weight: int
  last_updated: timestamp
}

costumes.monster -> monsters.id
D2 Flowchart
dogs -> cats -> mice: chase
replica 1 <-> replica 2
a -> b: To err is human, to moo bovine {
  source-arrowhead: 1
  target-arrowhead: * {
    shape: diamond
  }
}
Asciidoctor Output
Asciidoctor installieren
Vorteile des Containers - Enthaltene Applikationen
Beispiel
HTML erstellen
Ergebnis
asciidoctor-pdferstellt eine PDF Version
Eigene Vorlagen
Bestehende Dokumentation
Doc und Docx können zu Asciidoc konvertiert werden
pandoc input.docx -f docx -t asciidoc --wrap=none --markdown-headings=atx \
  --extract-media=extracted-media -o output.adoc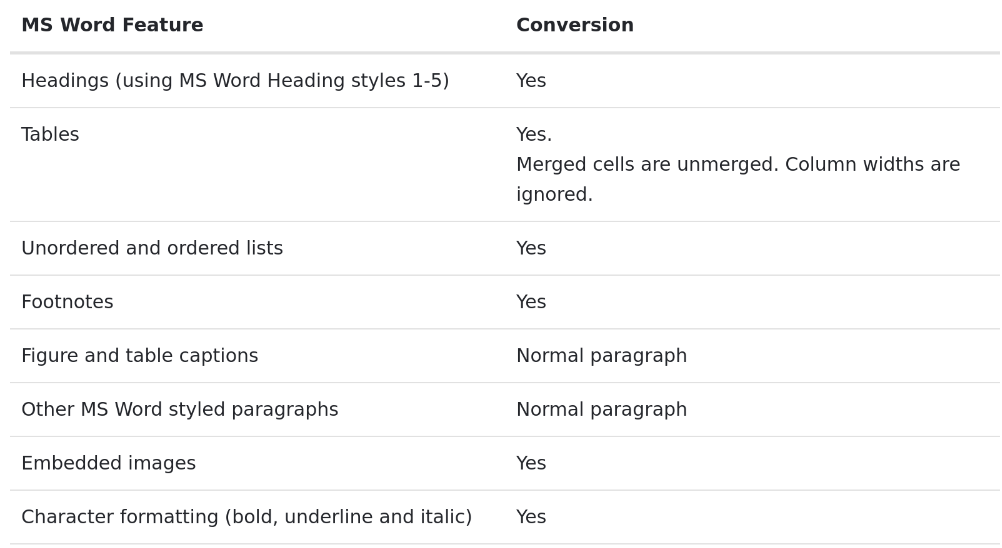
PDF mit Template/Theme
asciidoctor-pdf \
  -r asciidoctor-diagram \                   (1)
  -a pdf-themesdir=~/.asciidoctor/theme \    (2)
  -a pdf-theme=stoeps-theme.yml \            (3)
  "document.adoc"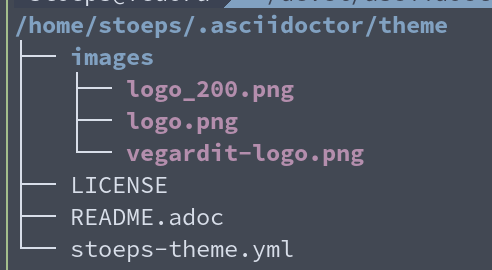
| 1 | Diagramme erstellen |
| 2 | PDF Template Verzeichnis |
| 3 | Template Name |
PDF theme
PDF Theme - Title
Beispieldokument mit Theme
Default (doctype=article)
doctype=book
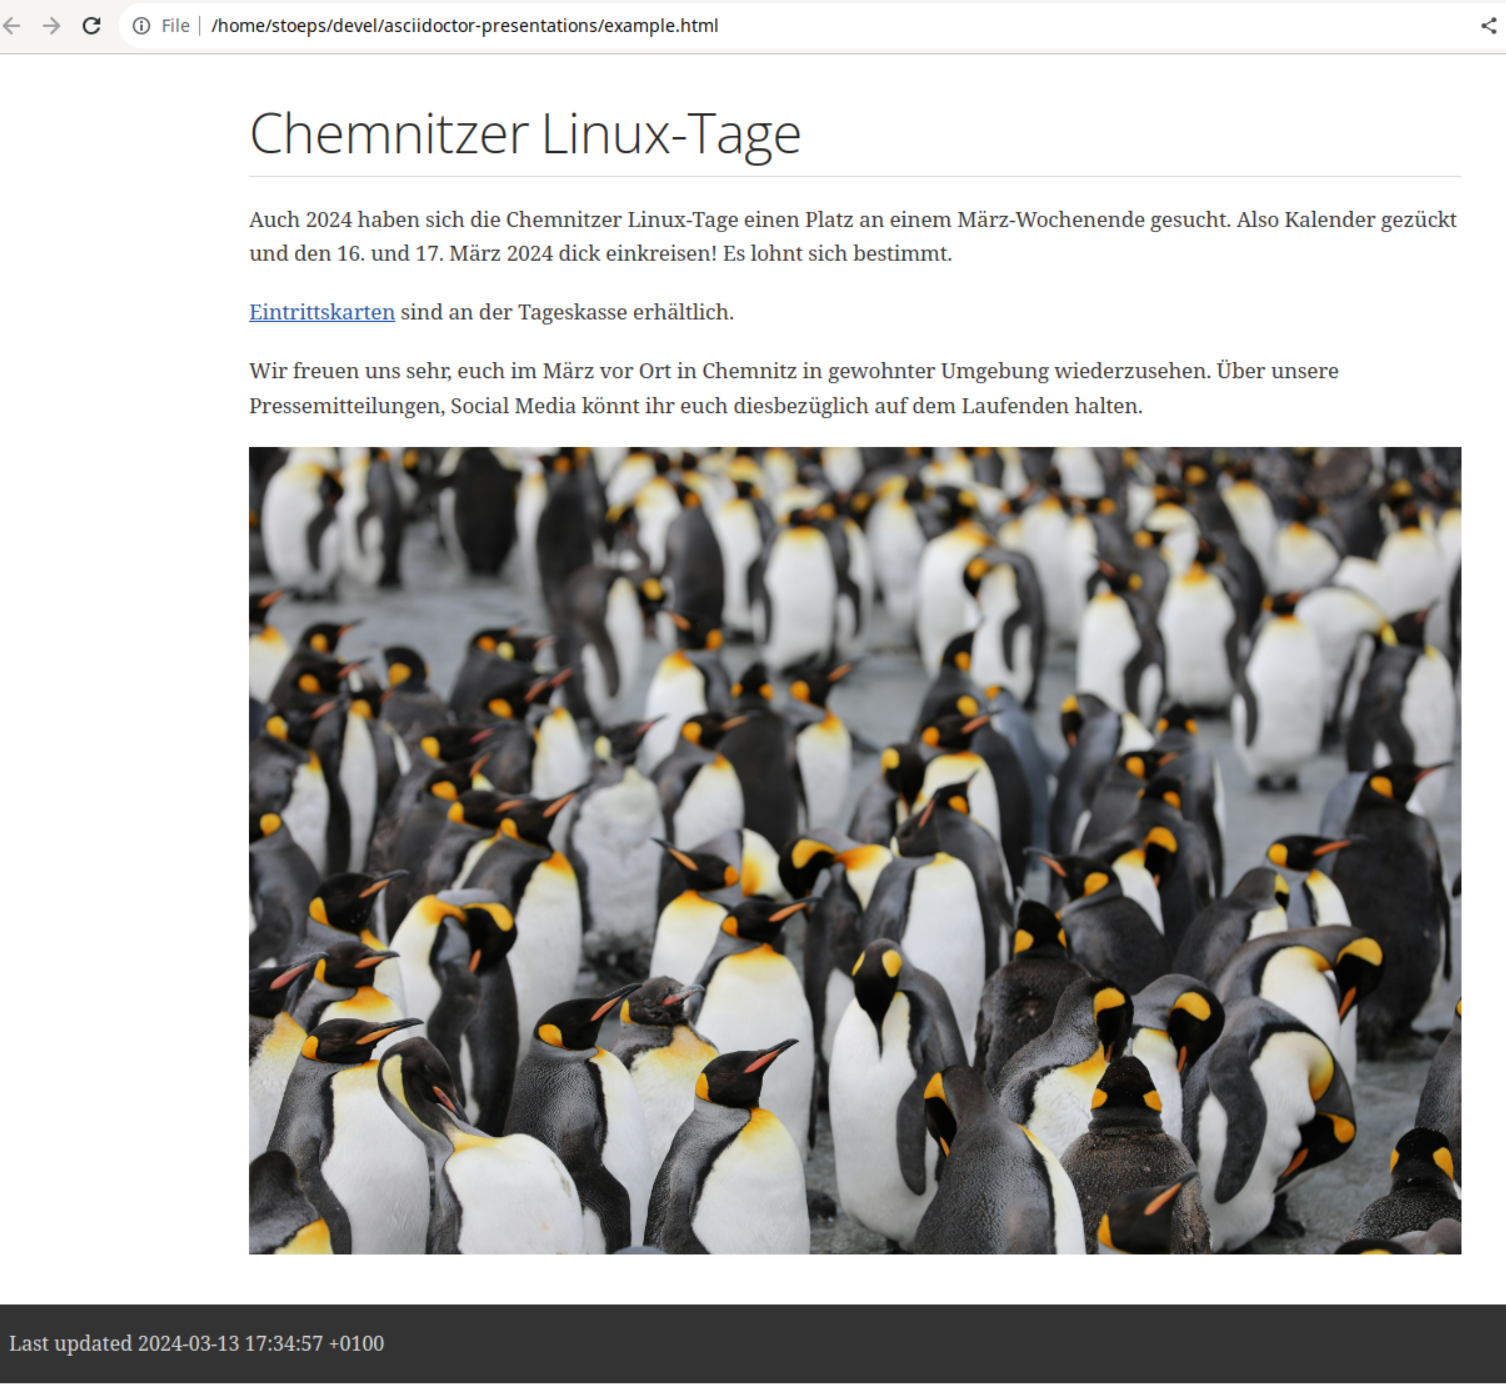
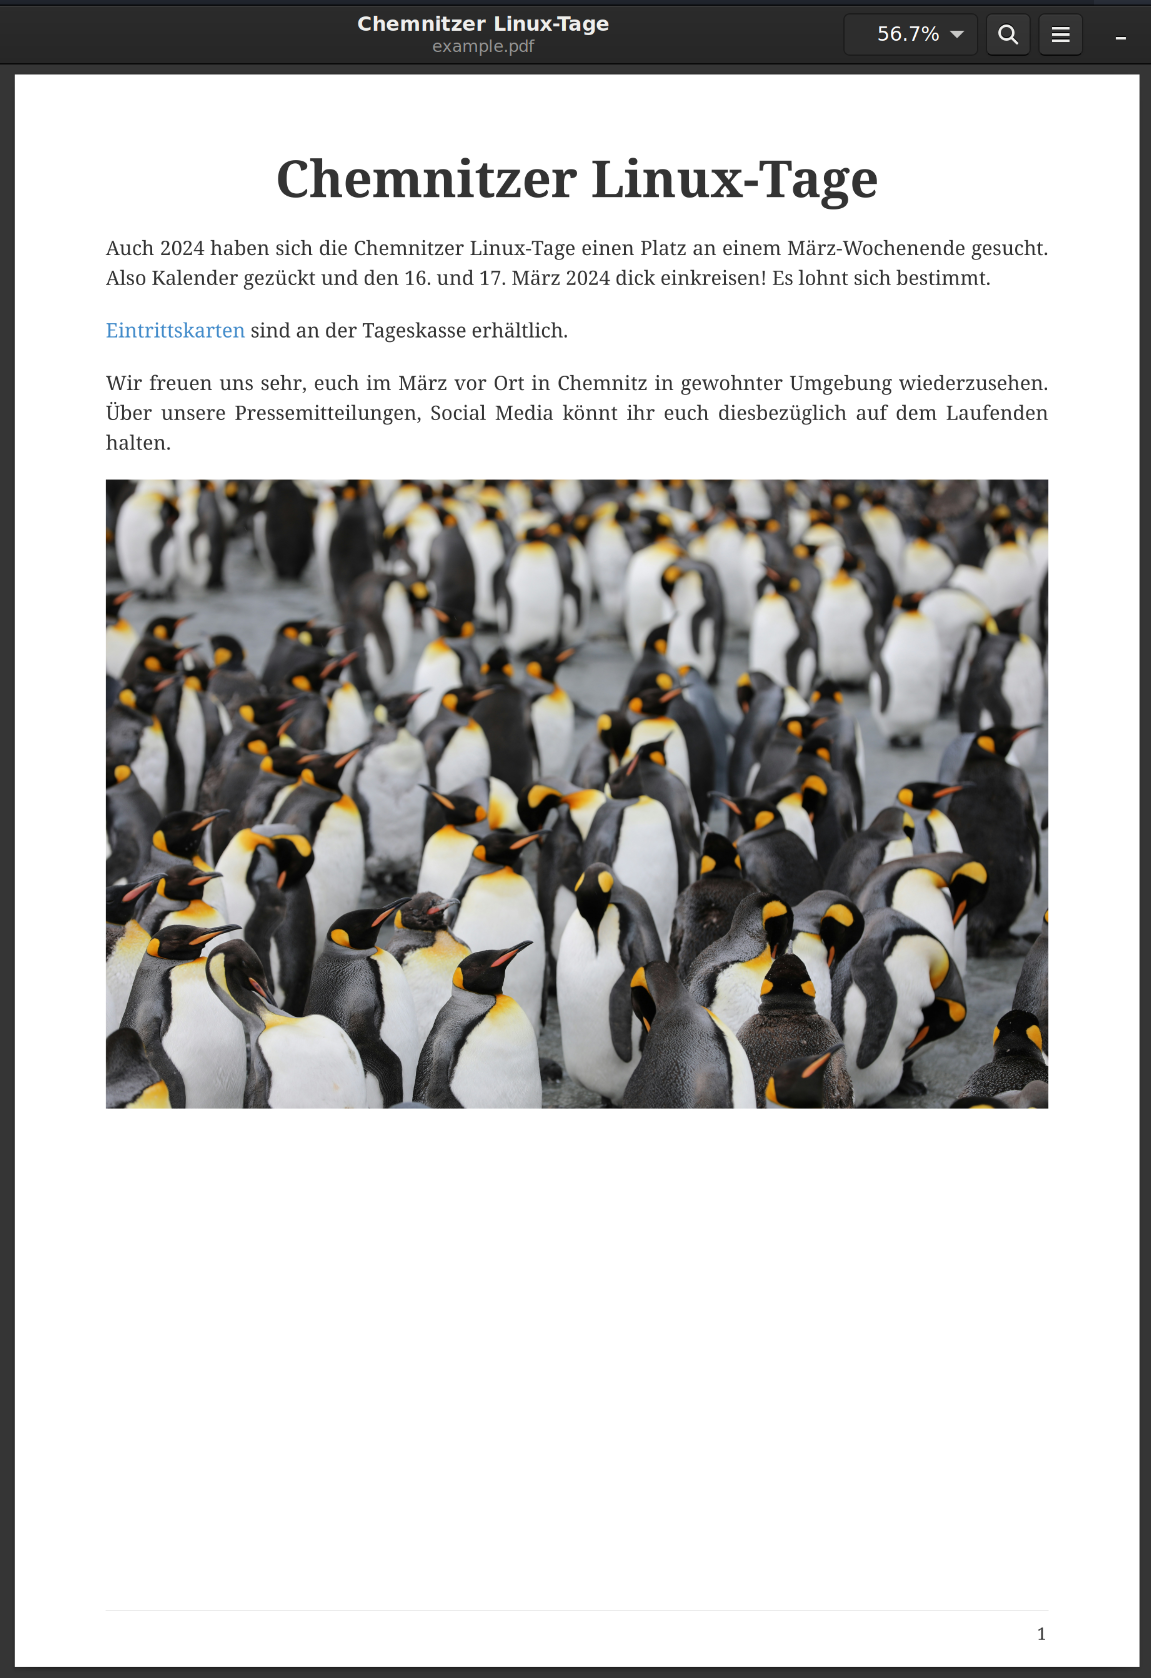
= Chemnitzer Linux-Tage
:author: Christoph Stoettner
:email: stoeps@vegardit.com
:doctype: book
:logo-image-name: vegardit-logo.png